

In part 1 of this tutorial, we learned to create a simple Ghost theme from scratch. In this post, we'll learn how to add a dynamic navigation bar and pagination to the theme.
This tutorial is divided into a few sections. If you missed any previous posts, please read them first.
- Part 1 - Create a simple Ghost theme.
- Part 2 - Add navigation bar and custom templates.
- Part 3 - Add search to the theme.
- Part 4 - Integrating comments and partials.
Download source code
If you are facing any issues or errors, you can download the source code from GitHub and use it as a reference. Code downloaded from previous posts will be different.
Add Navigation Bar
Ghost allows you to create custom navigation menus so that you can define a clear structure for the blog.
Here's an example of a custom navigation menu.

The {{navigation}} helper
Themes can use the {{navigation}} helper to add support for the custom navigation menu. You can simply add this helper to the pages on which you want to display the navigation bar. The navigation helper by default uses a pre-defined HTML template to create a navigation bar.
Example:
<ul class="nav">
    <li class="nav-home nav-current"><a href="/">Home</a></li>
    <li class="nav-about"><a href="/about">About</a></li>
    <li class="nav-contact"><a href="/contact">Contact</a></li>
</ul>
Add navigation support to the theme
To add custom navigation menu support to our theme, add the {{navigation}} just below the <body> tag in default.hbs . We can use the navigation helper in any templates we add.
Adding navigation helper to default.hbs will make the nav bar visible on all pages.
<body class="{{body_class}}">
{{"navigation"}}
{{!-- All the main content gets inserted here, index.hbs, post.hbs, etc --}}
{{{body}}}
<div class="card">
<div class="card-footer text-muted">
© {{date format="YYYY"}} {{@site.title}}
</div>
</div>
{{ghost_foot}}
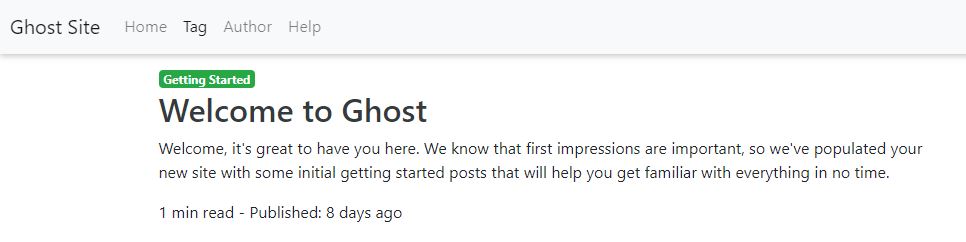
</body>Navigate to the home page of the blog and you will notice a simple navigation bar displayed at the top of the page.

This navigation bar looks too basic. Isn't it? So let's override the default template and create a custom design.
Use a custom template
First, create a directory named partials in the root folder of the theme. This we where we keep the reusable parts of our theme.
To use a custom template for the navigation bar, we should add a new file named navigation.hbs to the partials folder and add the following code to it.
<nav class="navbar navbar-expand-lg navbar-light bg-light fixed-top" style="box-shadow: 0 8px 6px -6px rgb(197, 197, 197);">

    <a class="navbar-brand" href="#">{{@site.title}}</a>
    <button class="navbar-toggler" type="button" data-toggle="collapse" data-target="#navbarToggler"
        aria-expanded="false">
        <span class="navbar-toggler-icon"></span>
    </button>

    <div class="collapse navbar-collapse" id="navbarToggler">
        <ul class="navbar-nav mr-auto mt-2 mt-lg-0">
            {{#foreach navigation}}
            <li class="nav-item {{#if current}}active{{/if}}">
                <a class="nav-link" href="{{url absolute="true"}}">{{label}}</a>
            </li>
            {{/foreach}}
        </ul>
    </div>

</nav>
Please note that the name of the file should be navigation.hbs. If this file exists, Ghost will load it instead of the default template.Ghost needs a restart to detect new theme files. Therefore, reload the Ghost instance using ghost restart and reload the page to see our custom template in action.
This looks much better now.
Display logo
The navigation menu we created simply displays some pages to which the user can navigate. We can further customize the navigation bar by adding a logo or description of the blog.
To display the logo of the blog, modify the content of navigation.hbs as shown below.
<nav class="navbar navbar-expand-lg navbar-dark bg-success fixed-top"
    style="box-shadow: 0 8px 6px -6px rgb(197, 197, 197);">

    {{!-- Site icon --}}
    <a class="navbar-brand" href="{{@site.url}}">
        <img src="{{@site.logo}}" alt="{{@site.title}}" class="site-logo">
    </a>

    {{!-- Toogler --}}
    <button class="navbar-toggler" type="button" data-toggle="collapse" data-target="#navbarToggler"
        aria-expanded="false">
        <span class="navbar-toggler-icon"></span>
    </button>

    {{!-- Links --}}
    <div class="collapse navbar-collapse" id="navbarToggler">
        <ul class="navbar-nav mr-auto mt-2 mt-lg-0">
            {{#foreach navigation}}
            <li class="nav-item {{#if current}}active{{/if}}">
                <a class="nav-link" href="{{url absolute="true"}}">{{label}}</a>
            </li>
            {{/foreach}}
        </ul>
    </div>

</nav>
Also, add these styles to style.css to ensure that the logo will fit inside the navigation bar.
.site-logo {
    height: 30px;
    max-width: 150px;
}
Now the navigation bar will look similar to this. I changed the background color of the navbar to match the color of the site's logo.
Pagination
Similar to the navigation bar, Pagination is also templated-based. Ghost has a default template for pagination.
This is the default template of Ghost for pagination.
<nav class="pagination" role="navigation">
{{#if prev}}
<a class="newer-posts" href="{{page_url prev}}">← Newer Posts</a>
{{/if}}
<span class="page-number">Page {{page}} of {{pages}}</span>
{{#if next}}
<a class="older-posts" href="{{page_url next}}">Older Posts →</a>
{{/if}}
</nav>While creating the theme, we've configured it to display ten posts per page. A fresh installation of Ghost has only seven published posts. Therefore, either add new posts to the blog from the admin dashboard or configure the theme to display two posts per page so we can see how pagination works.
To change the number of posts displayed per page, open package.json located in the root folder of the template and modify the config section as:
    "config": {
        "posts_per_page": 2,
        "image_sizes": {}
    }
And restart the ghost instance by running ghost restart.
Add pagination to the theme
To add pagination support to the theme, open index.hbs and add {{pagination}} helper just above the <main> tag.
{{!< default}}
<main id="site-main">
    <div class="container">

        <div>
            {{#foreach posts}}
                {{!-- Code removed for brevity --}}
            {{/foreach}}

            {{pagination}}
        </div>
    </div>
</main>
Visit the blog on your browser and scroll to the bottom of the page to see the changes.
Use custom pagination template
We can also use a custom template for pagination by creating a file named pagination.hbs in the partials folder.
Here's an example.
partials/pagination.hbs
<div>
{{#if prev}}
<span class="page-item">
<a class="page-link" href="{{page_url prev}}" style="float: left;">← Newer posts</a>
</span>
{{/if}}
{{#if next}}
<span class="page-item">
<a class="page-link" href="{{page_url next}}" style="float:right">Older posts →</a>
</span>
{{/if}}
</div>Restart the Ghost instance using ghost restart command and navigate to the home page of the blog.
Pagination helpers
Ghost offers a few helpers that can be used only in the context of pagination.
{{page_url}}- acceptsprev,nextand$numberto link to a particular page.{{page}}- outputs the current page number.{{pages}}- outputs the total number of pages.
In the next section, we'll learn how to add search option to our theme.


